In this short guide I’ll summarize the procedure needed to print images from black and white negatives.
⚠️ Remember:
ALWAYS TRIPLE CHECK THAT ALL THE LIGHTS ARE OFF BEFORE OPENING THE PAPER BOX (CHECK ALSO FOR PHONES, SMARTWATCHES, …). THE PAPER CAN ONLY BE HANDLED UNDER SAFE LIGHTS.
In this entire article everytime I mention handling paper it will be implied that I’m working under safe lights.
1. Prepare your setup
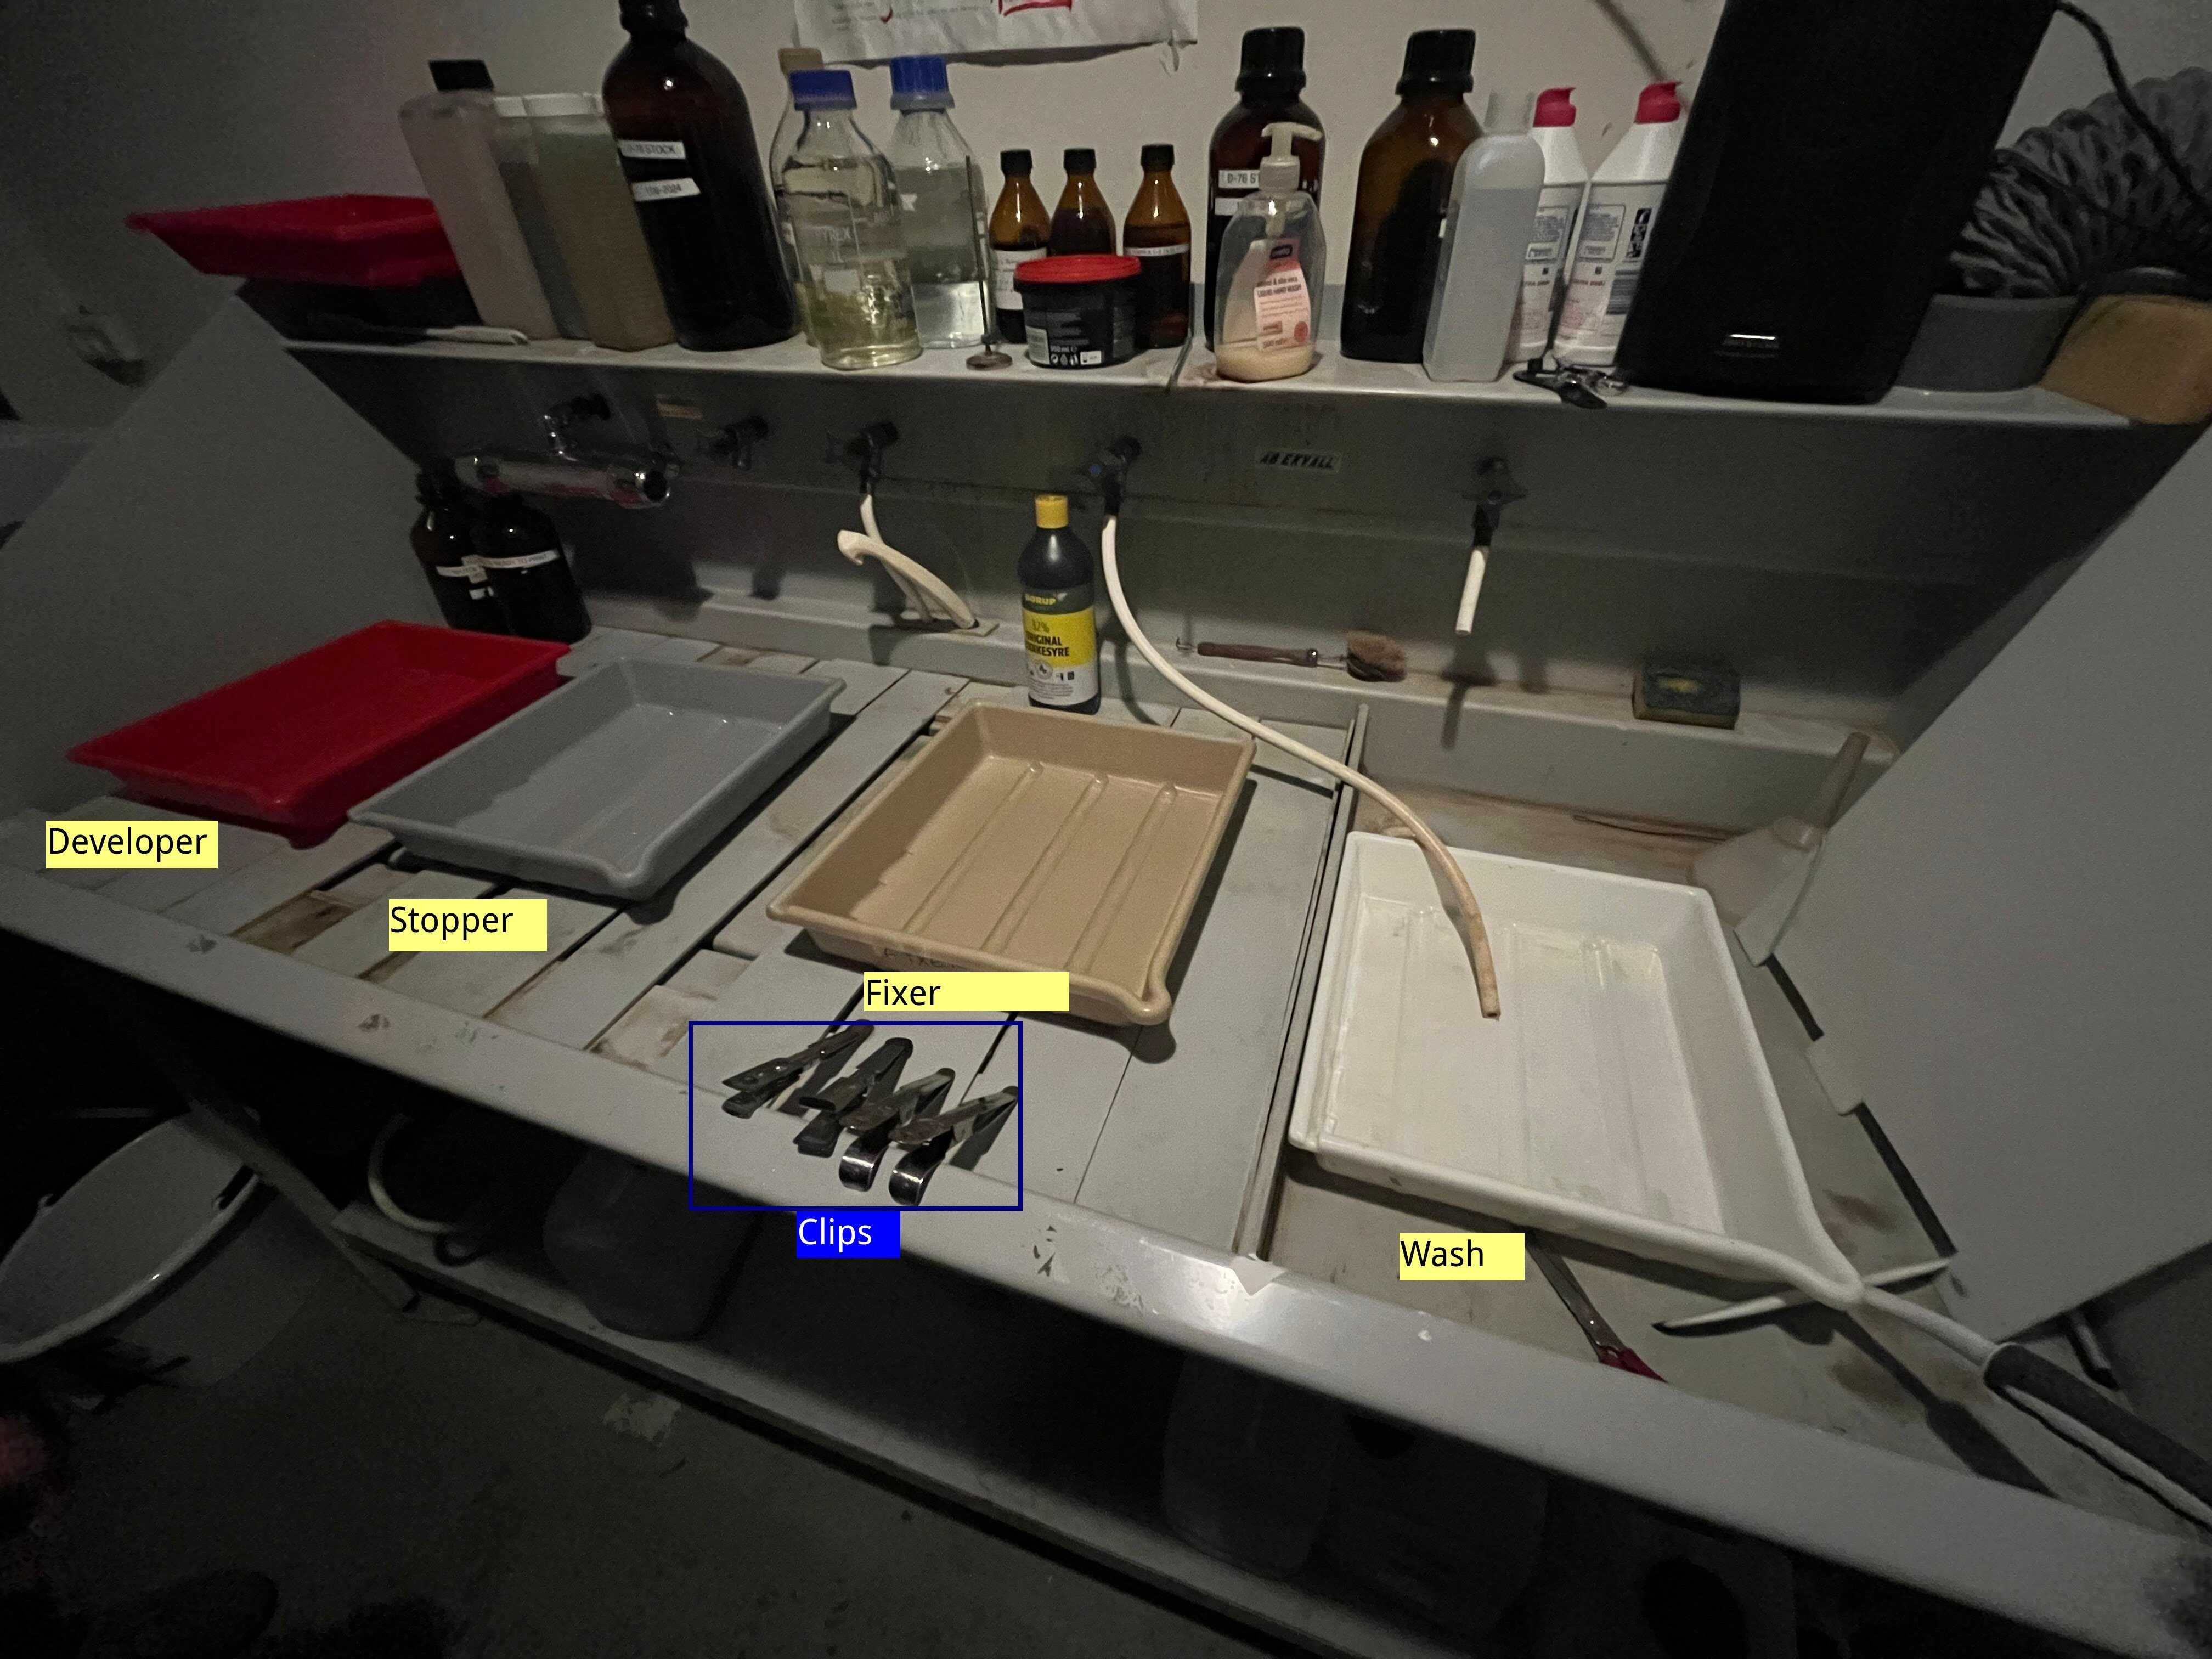
First layout the needed trays in the following order:
- Developer
- Stopper
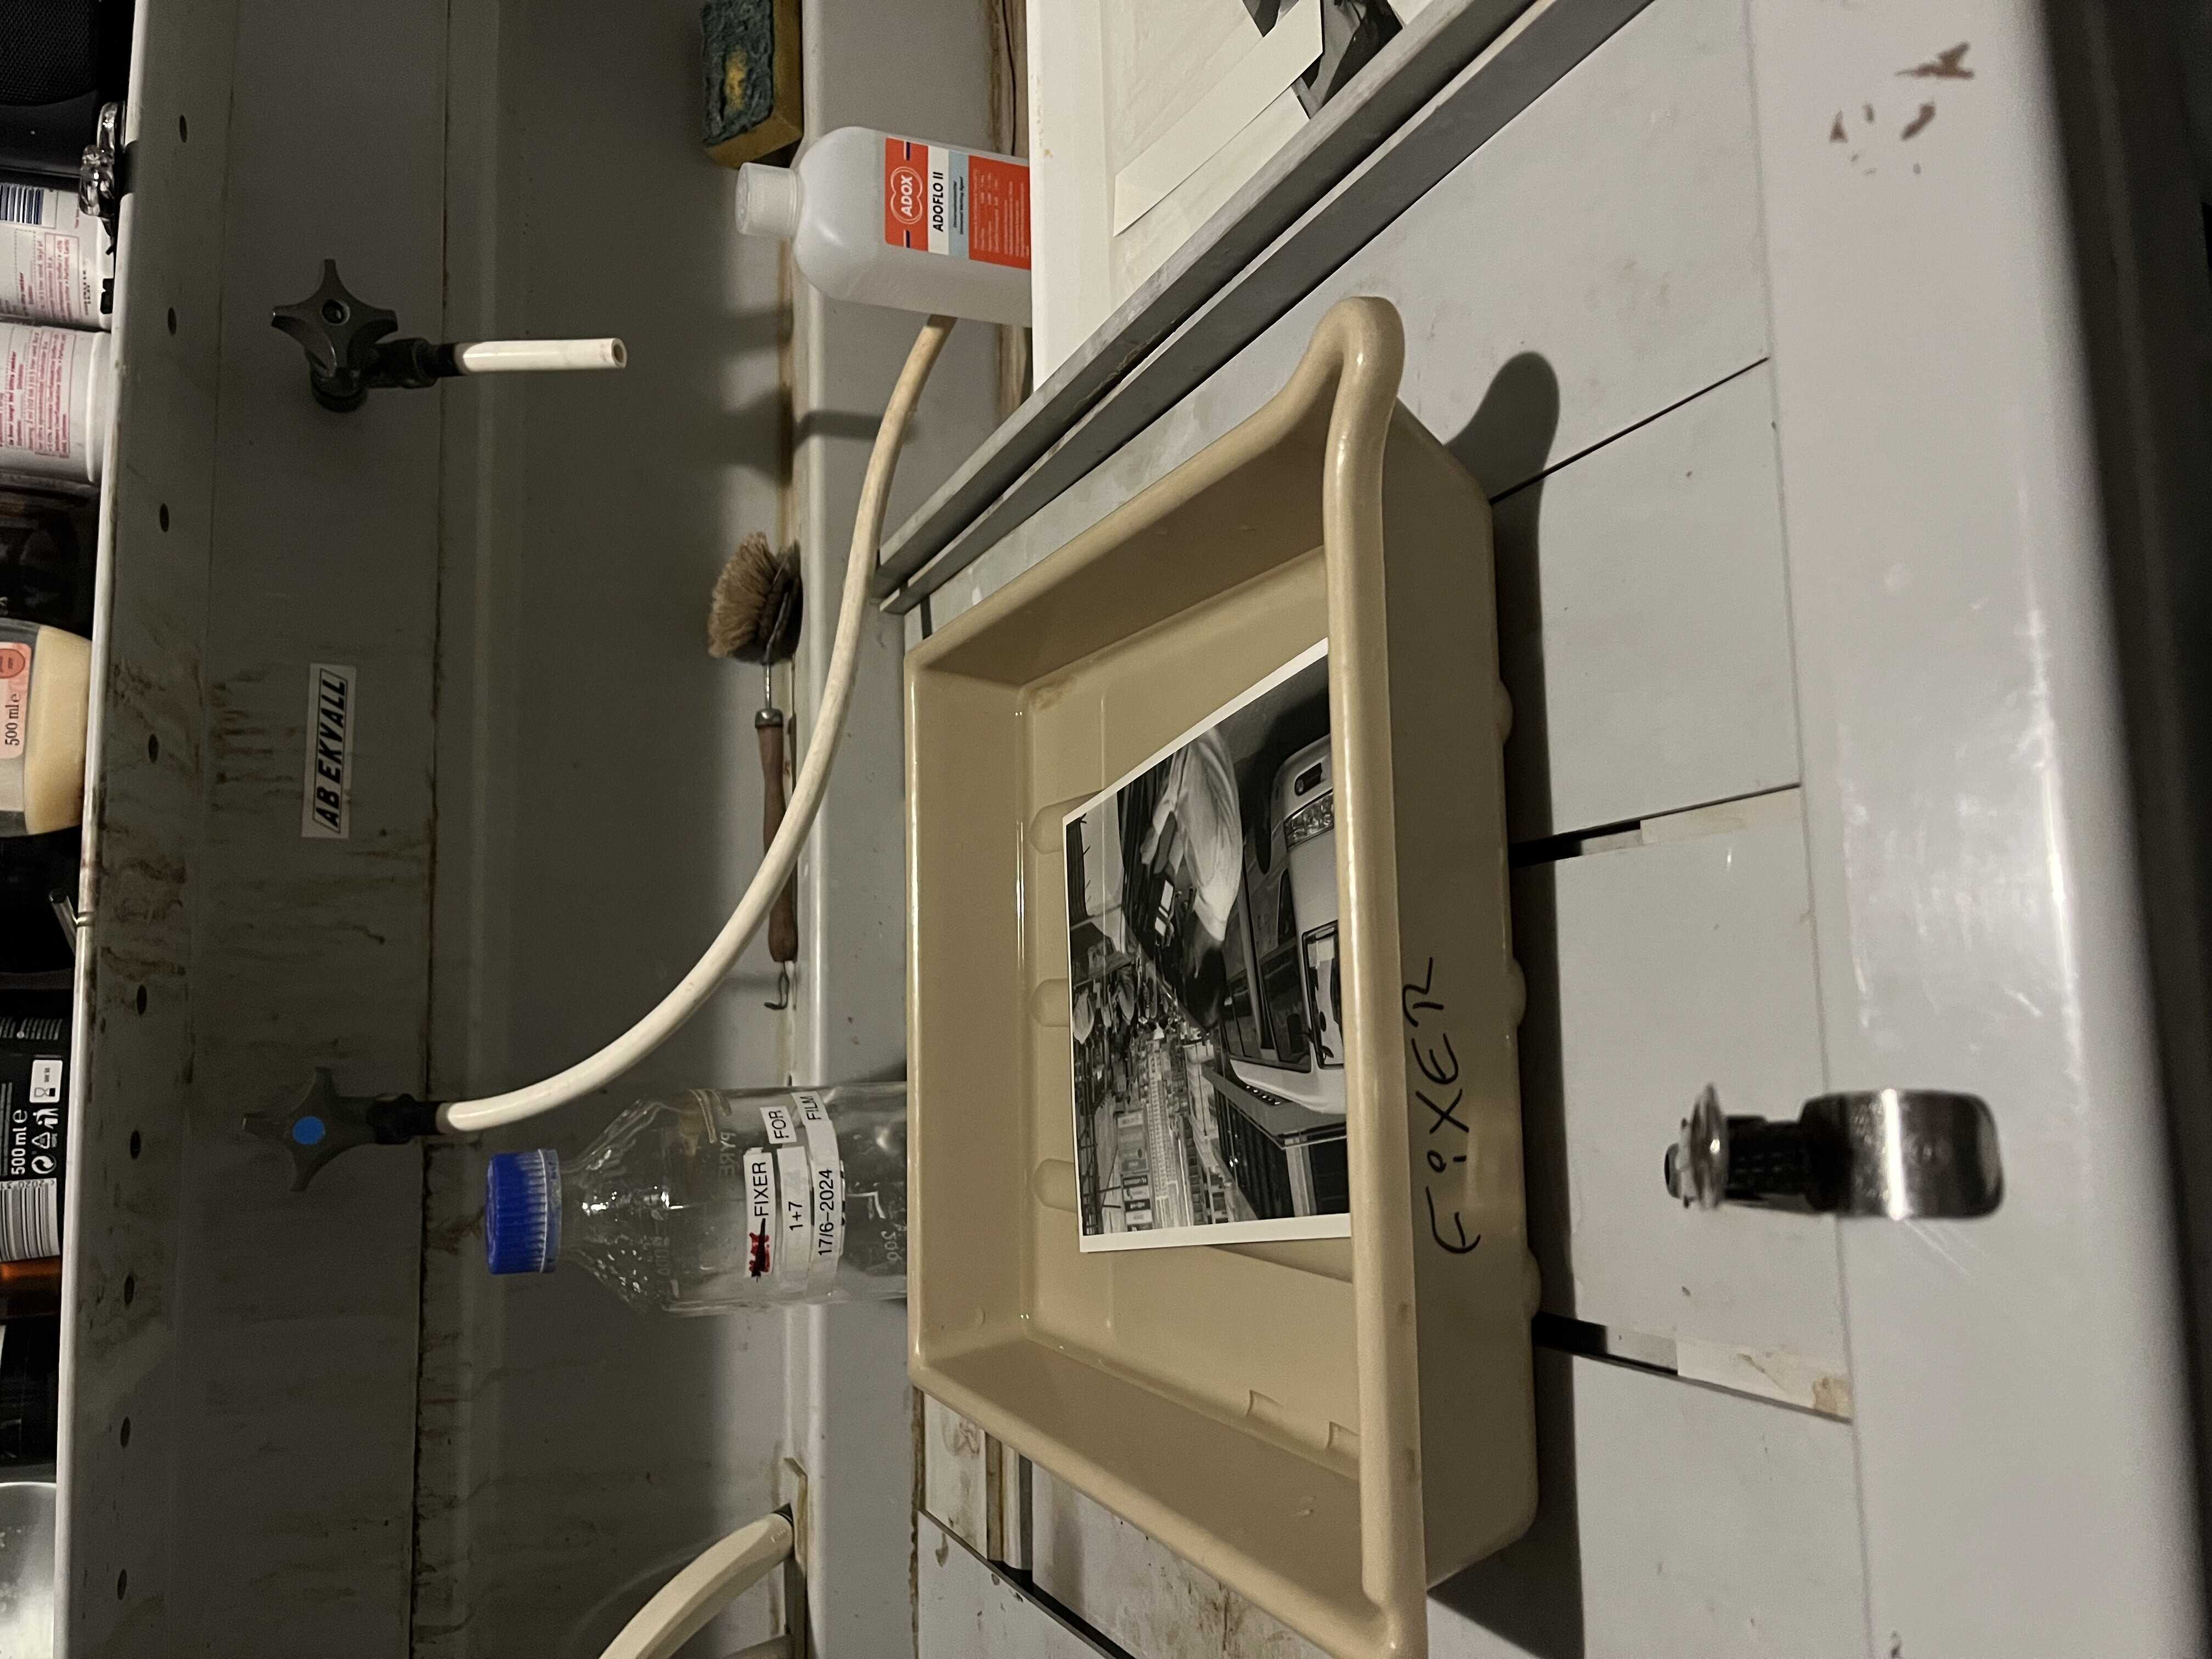
- Fixer
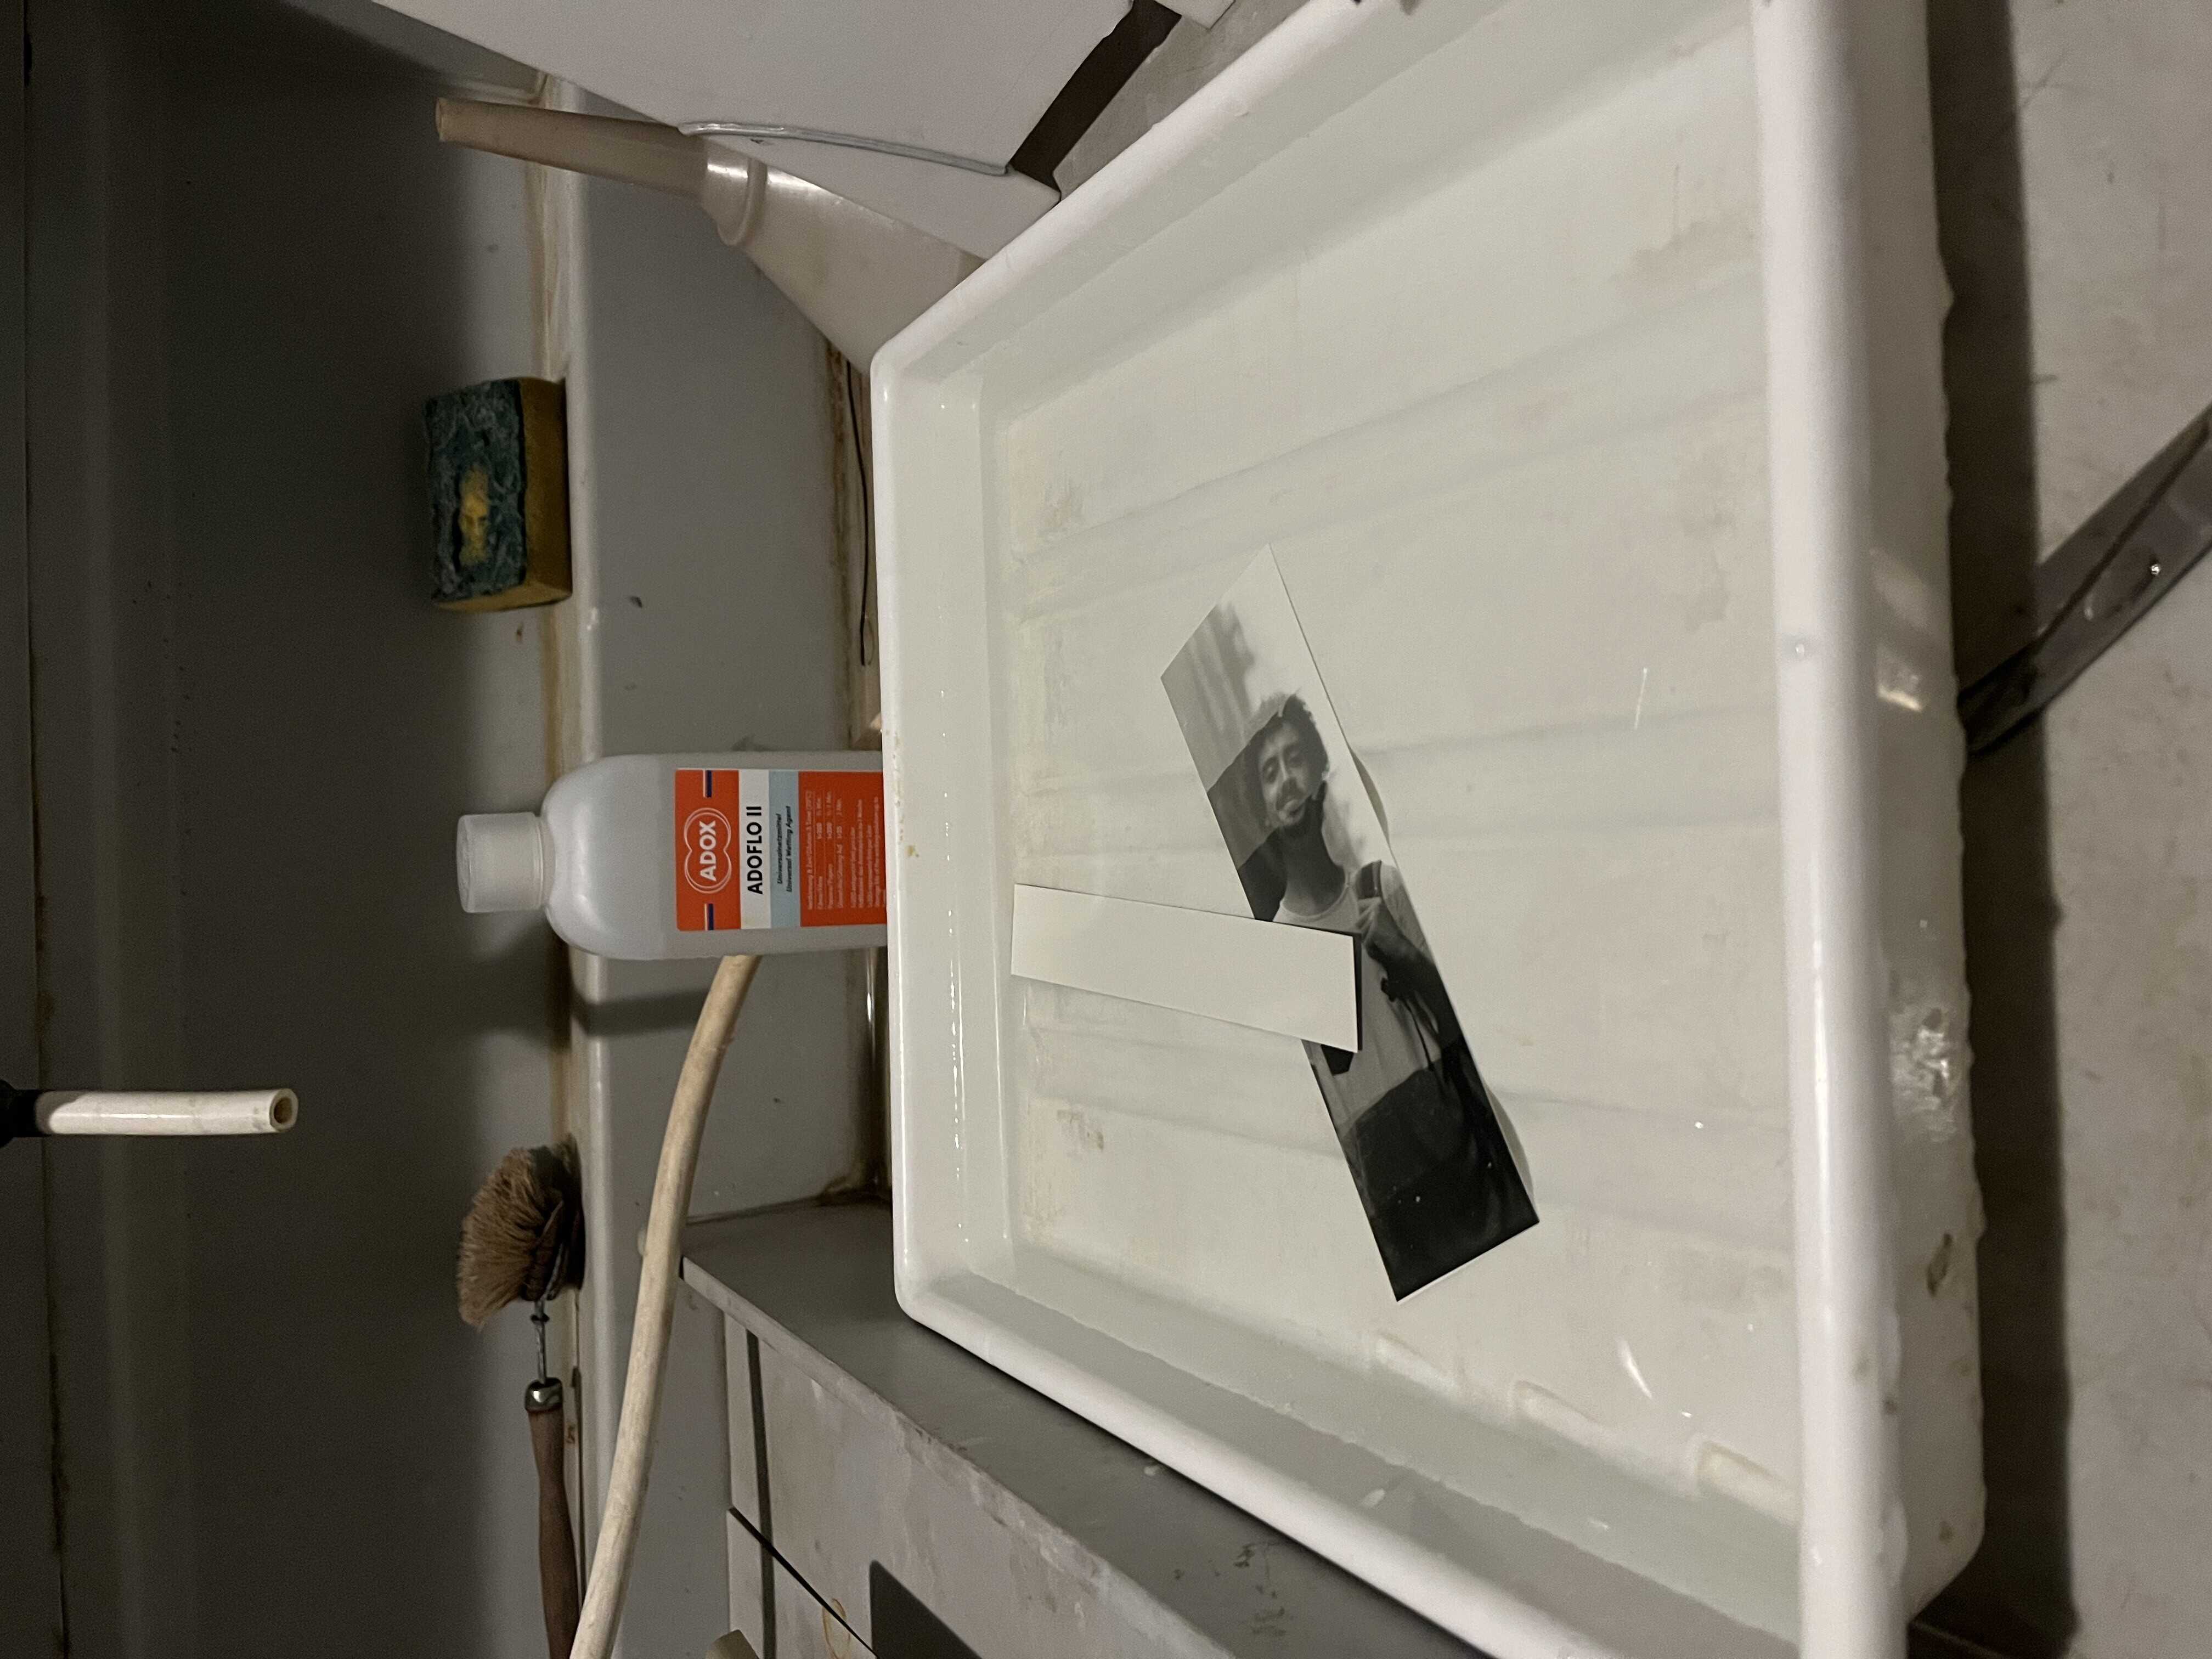
- Wash
For each tray also prepare a clip: you’ll use it to take out the paper from the basin. Remember to use that clip only for that tray, to avoid mixing chemicals.
a) Developer
Pour DEKTOL in the tray. Put as much as needed to at least submerge a piece of paper.
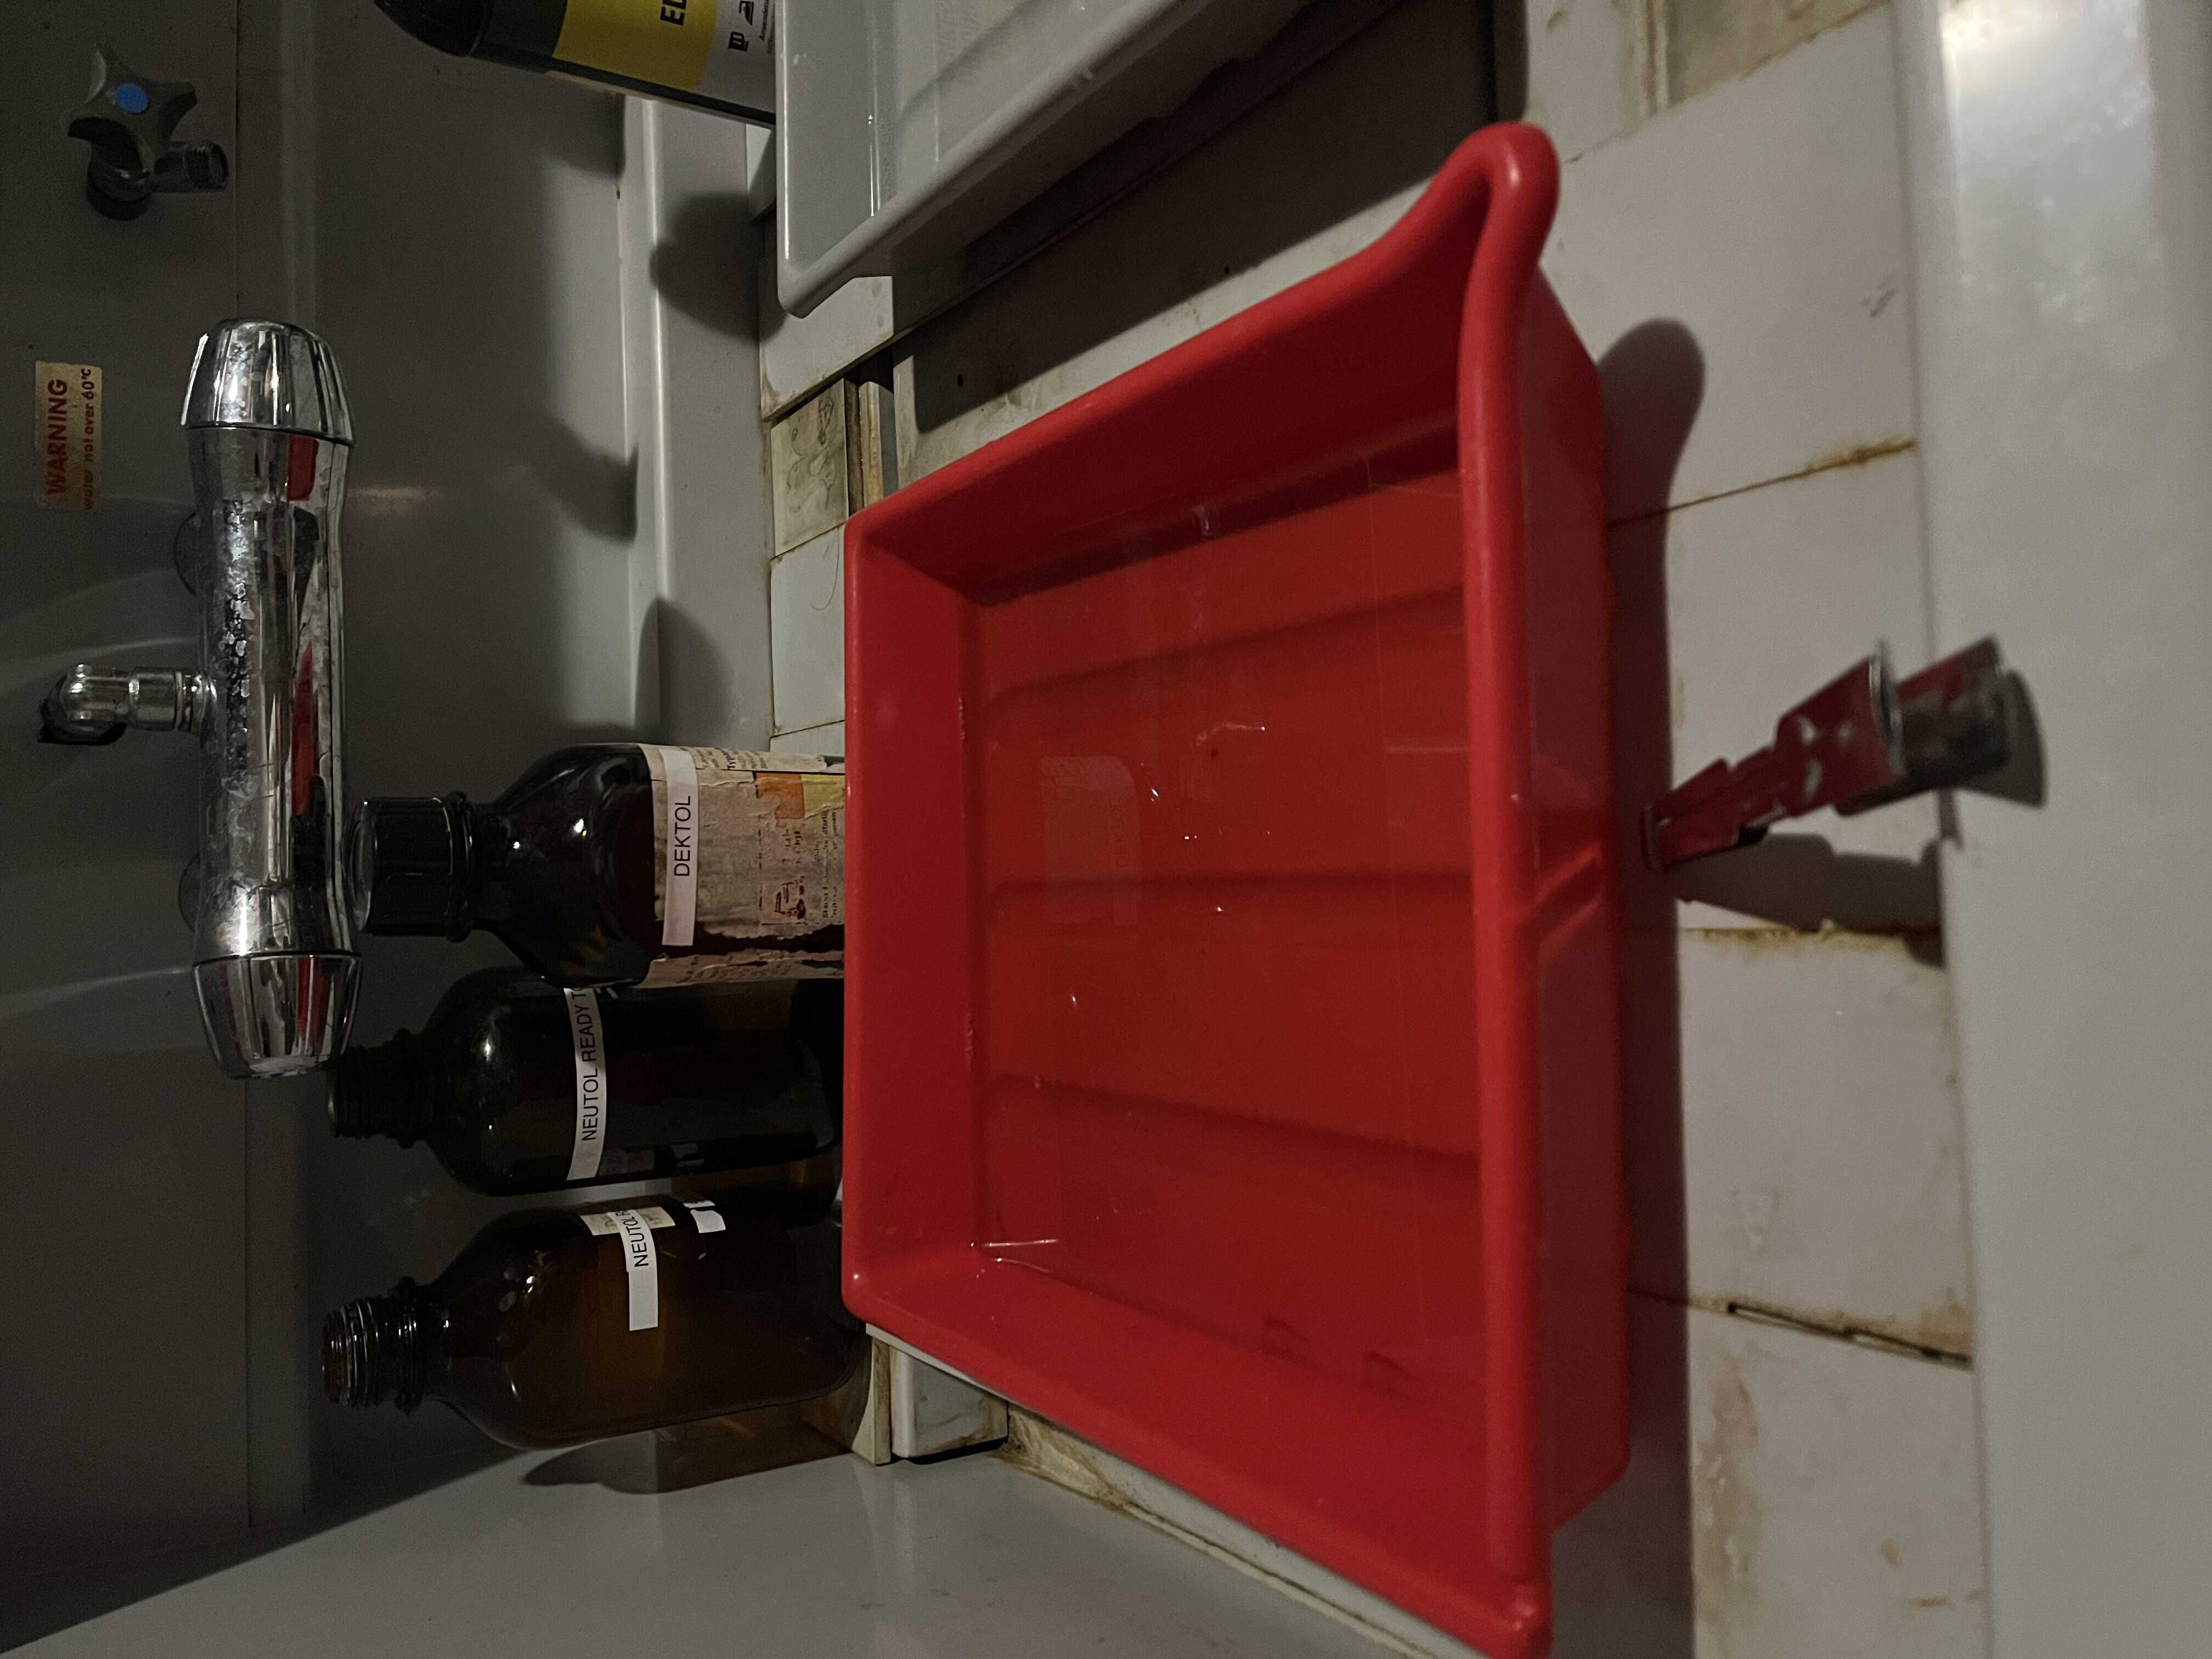
b) Stopper
To create the stopper wash put a bit (1/2 tablespoons) of Acetic acid (the bottle behind the tray) and fill the rest with water.

c) Fixer
Pour the whole bottle of fixer in the basin.
d) Wash
Fill with water and add just a couple of drop of that soap you see behind the tray (used to break surface tension).
2. Prepare the film
Choose the right film holder, put the negative in (emulsion side, aka matte side, down), align the correct frame and close. If you placed the the film correctly, later you should see the image rotated 180 degrees, but not flipped (e.g. the text will be readable).
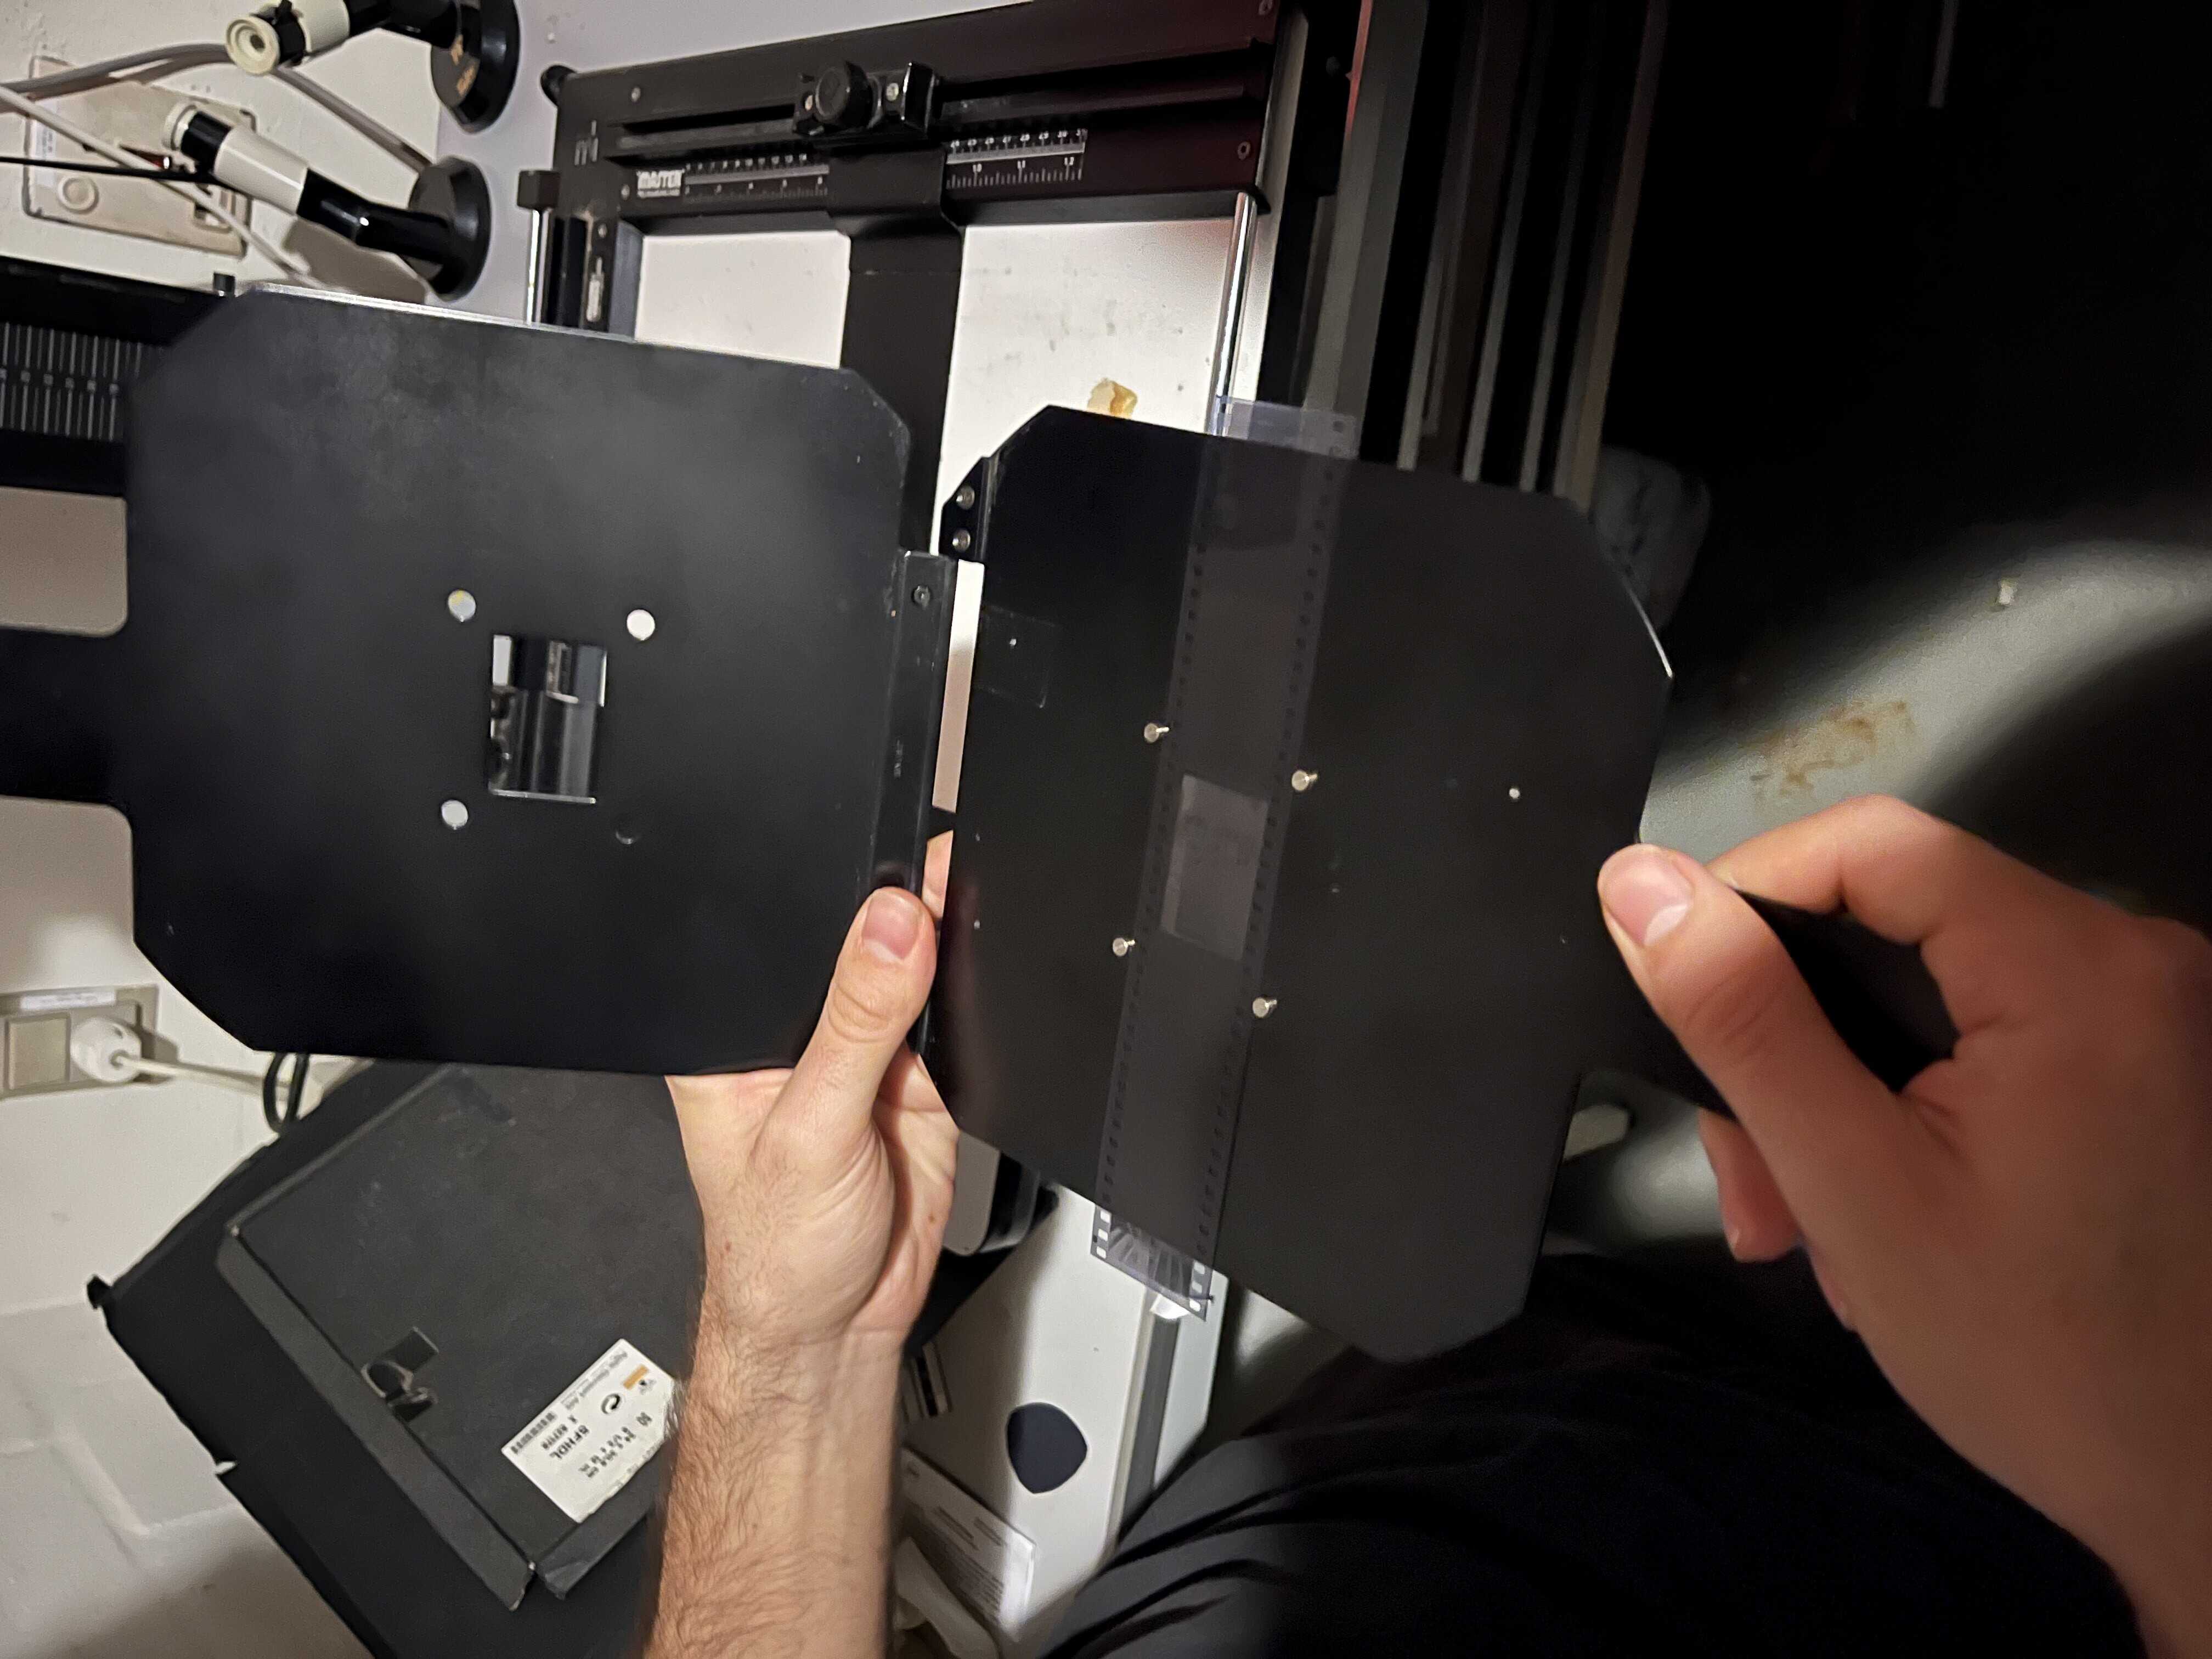
Now you’ll need to insert the holder into the enlarger: make sure that the lever is up (so that you can insert the film holder), than insert it into the machine and close the lever to secure the holder into place.

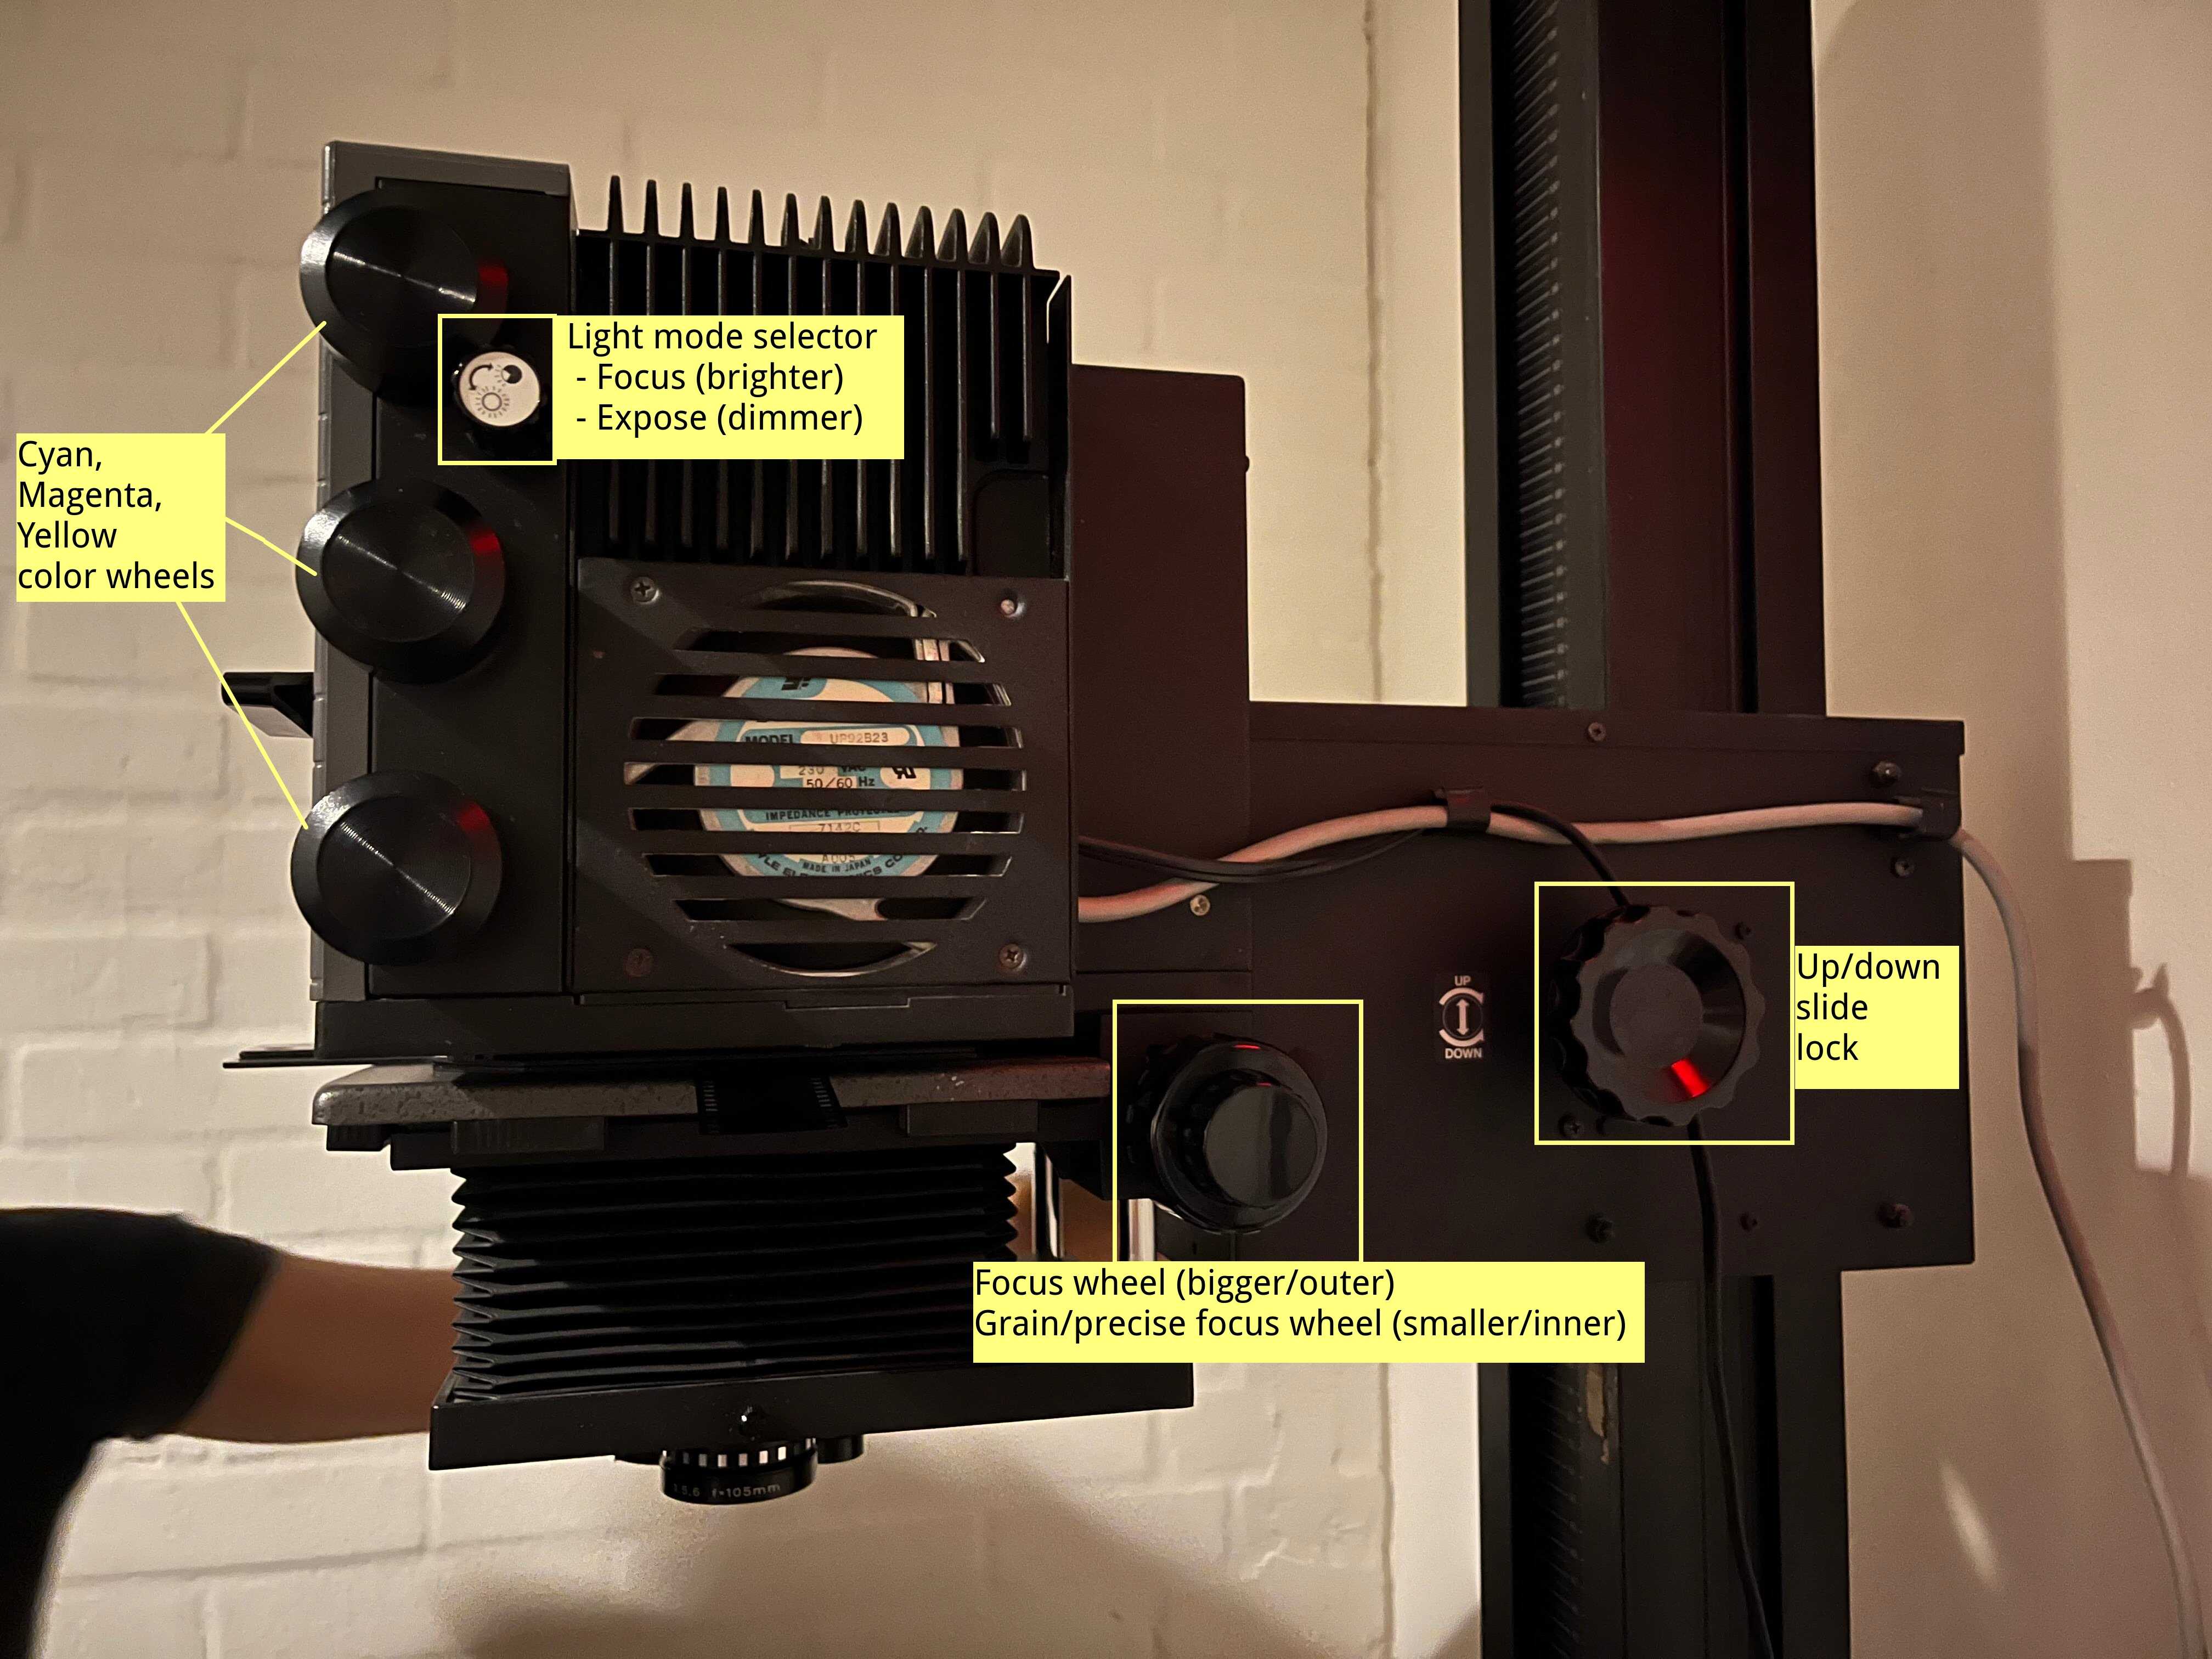
Now you’ll need to focus the image:
- Turn on the light (press the light bulb icon on the controller)
- Turn the light mode selector onto focus mode, the light should shine bright. You can also set a wider aperture on the lens to get more light.
- Now focus the image, you’ll need to make it as sharp as possible. Use the magnifier to better check the resulting image
- Start by using the big wheel for rough adjustments and then fine tune with the small wheel
- You can also slide the entire enlarger up and down (remember to lock/unlock before and after sliding it up/down) or change lens
In this step you’ll also frame/crop the image as you desire. Remember to set the desired final aperture on the lens (usually f/8 or f/11, since this are the sharpest).

3. Test exposure
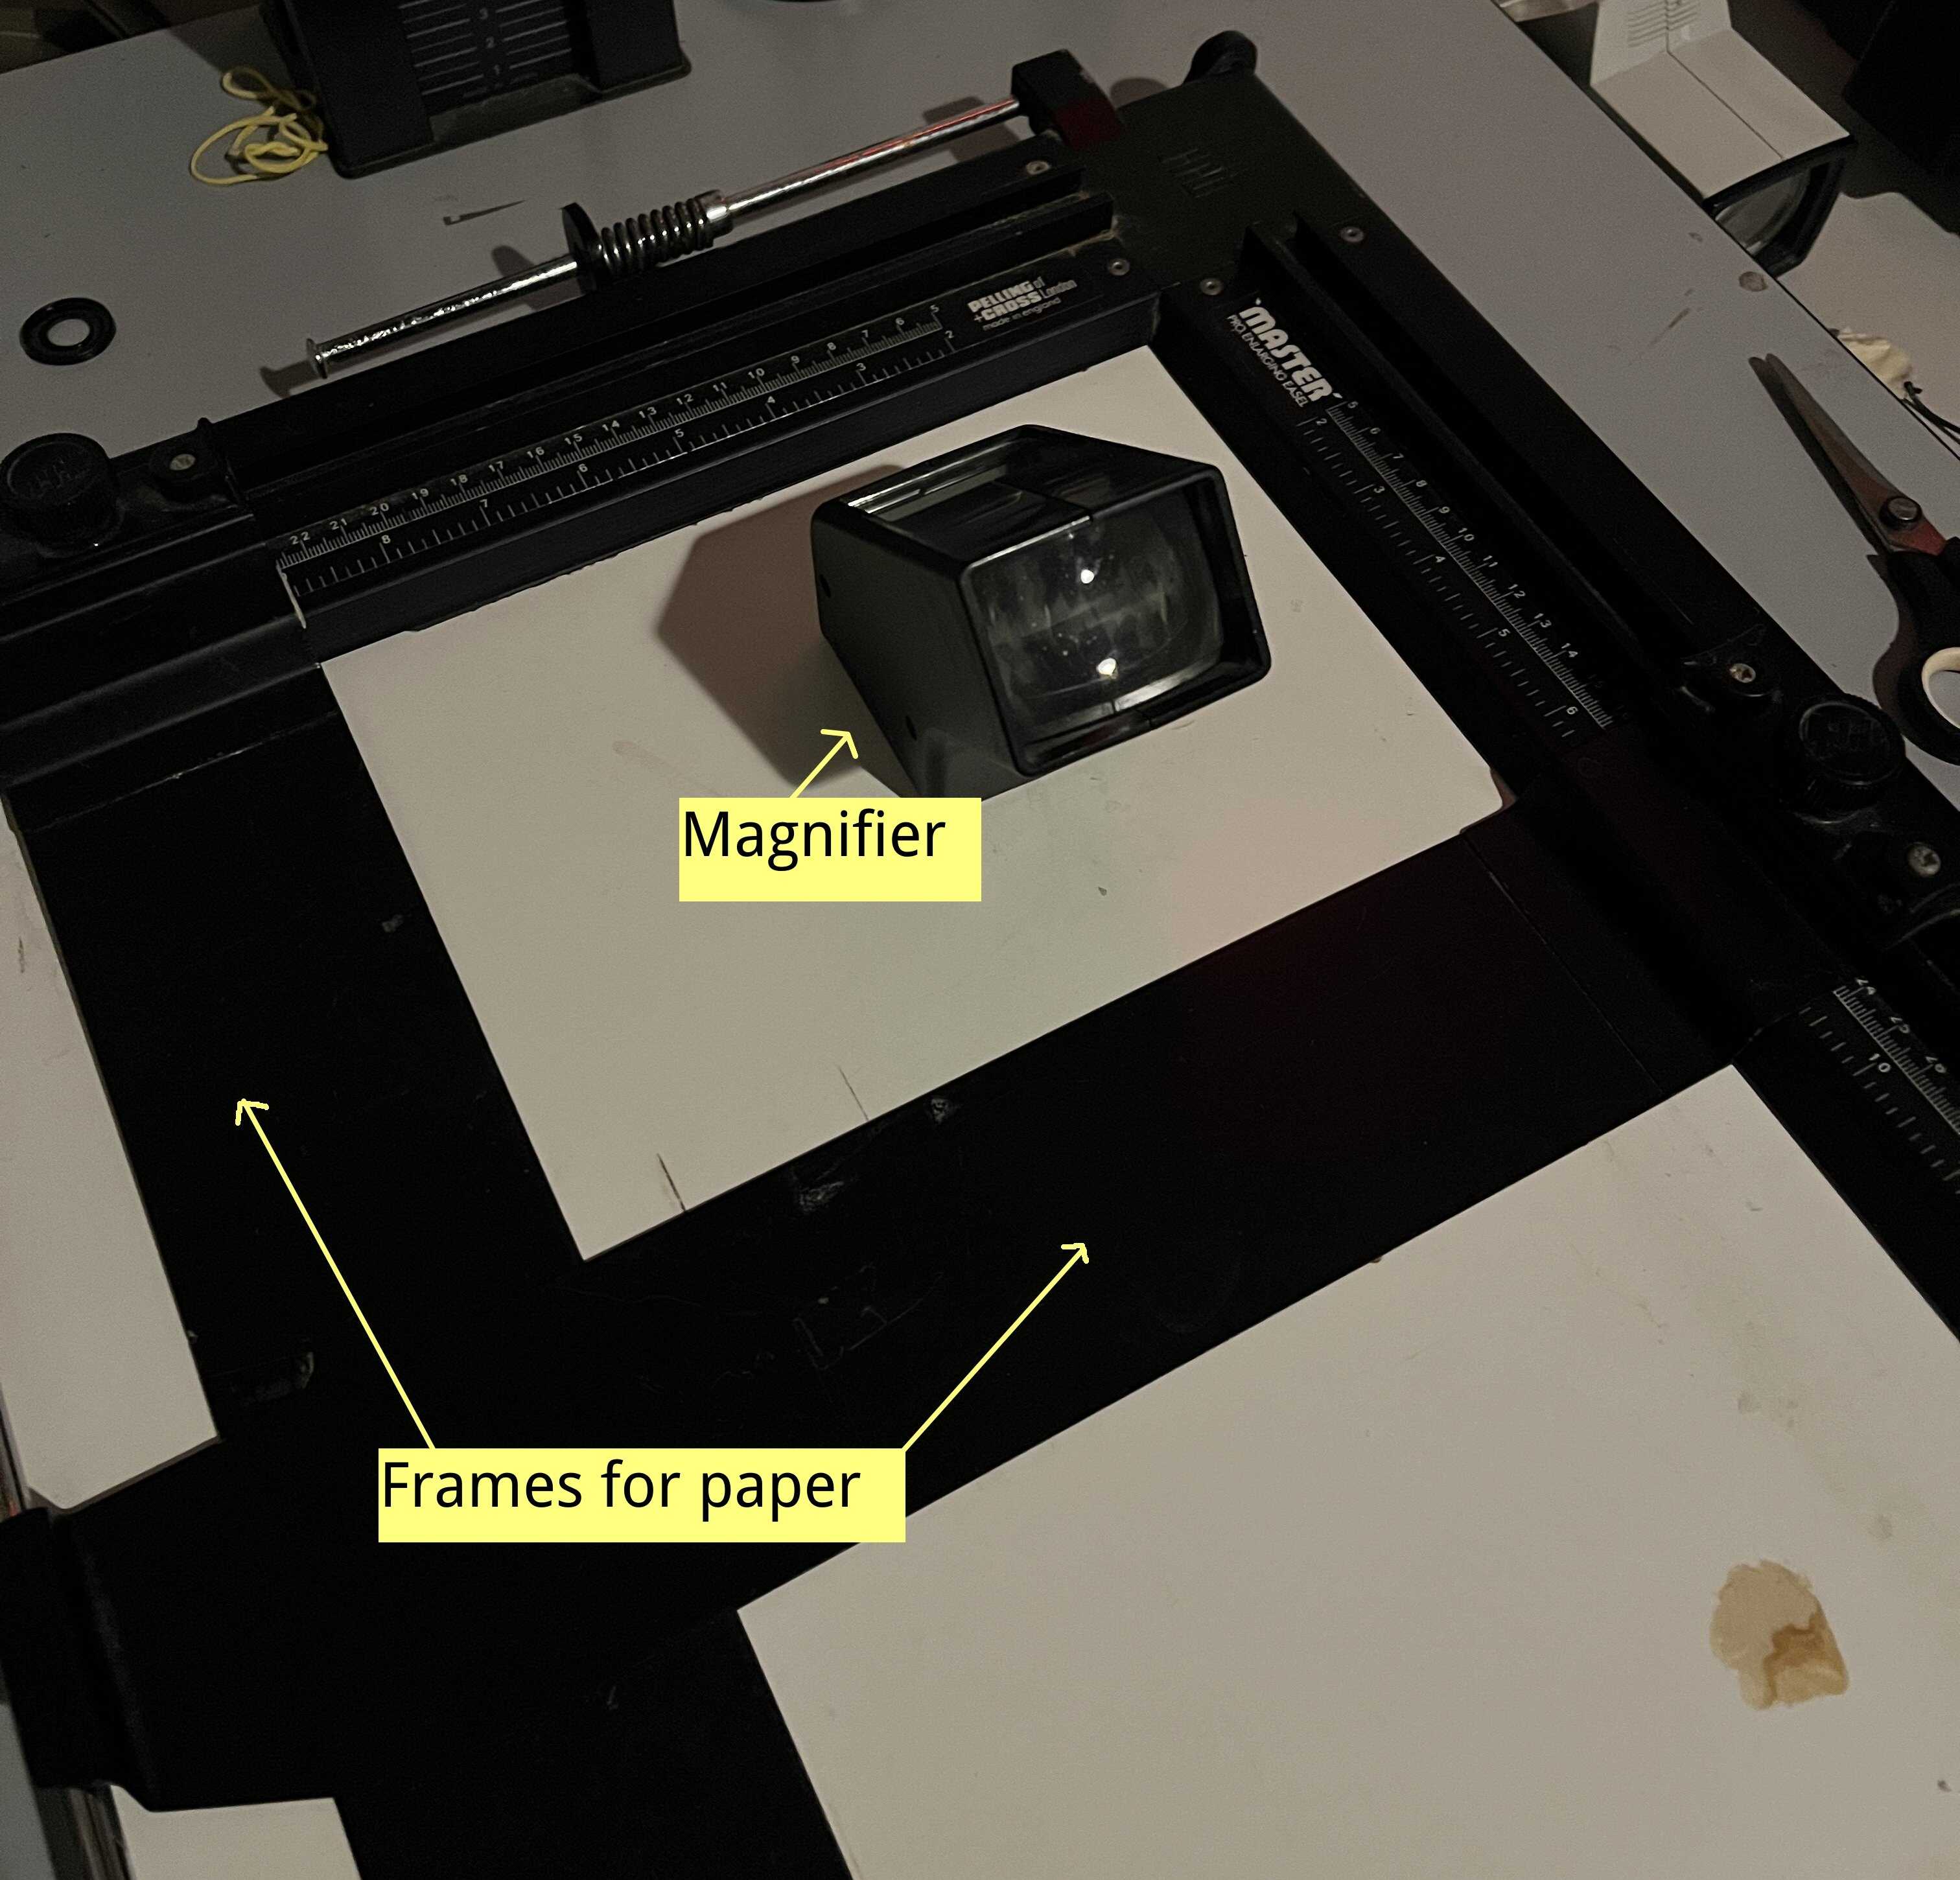
Before printing your full size image you’ll want to test exposure. First prepare yourself some test strips: if they’re not already available take a piece of paper and cut it into thin strips by using the paper cutter that’s on the table.
Now, take one of the test strips and place it in an important part of the image (it can be useful to mark this part with an object, like a pencil or scissors, since now the enlarger light is off and you’re not seeing the picture).
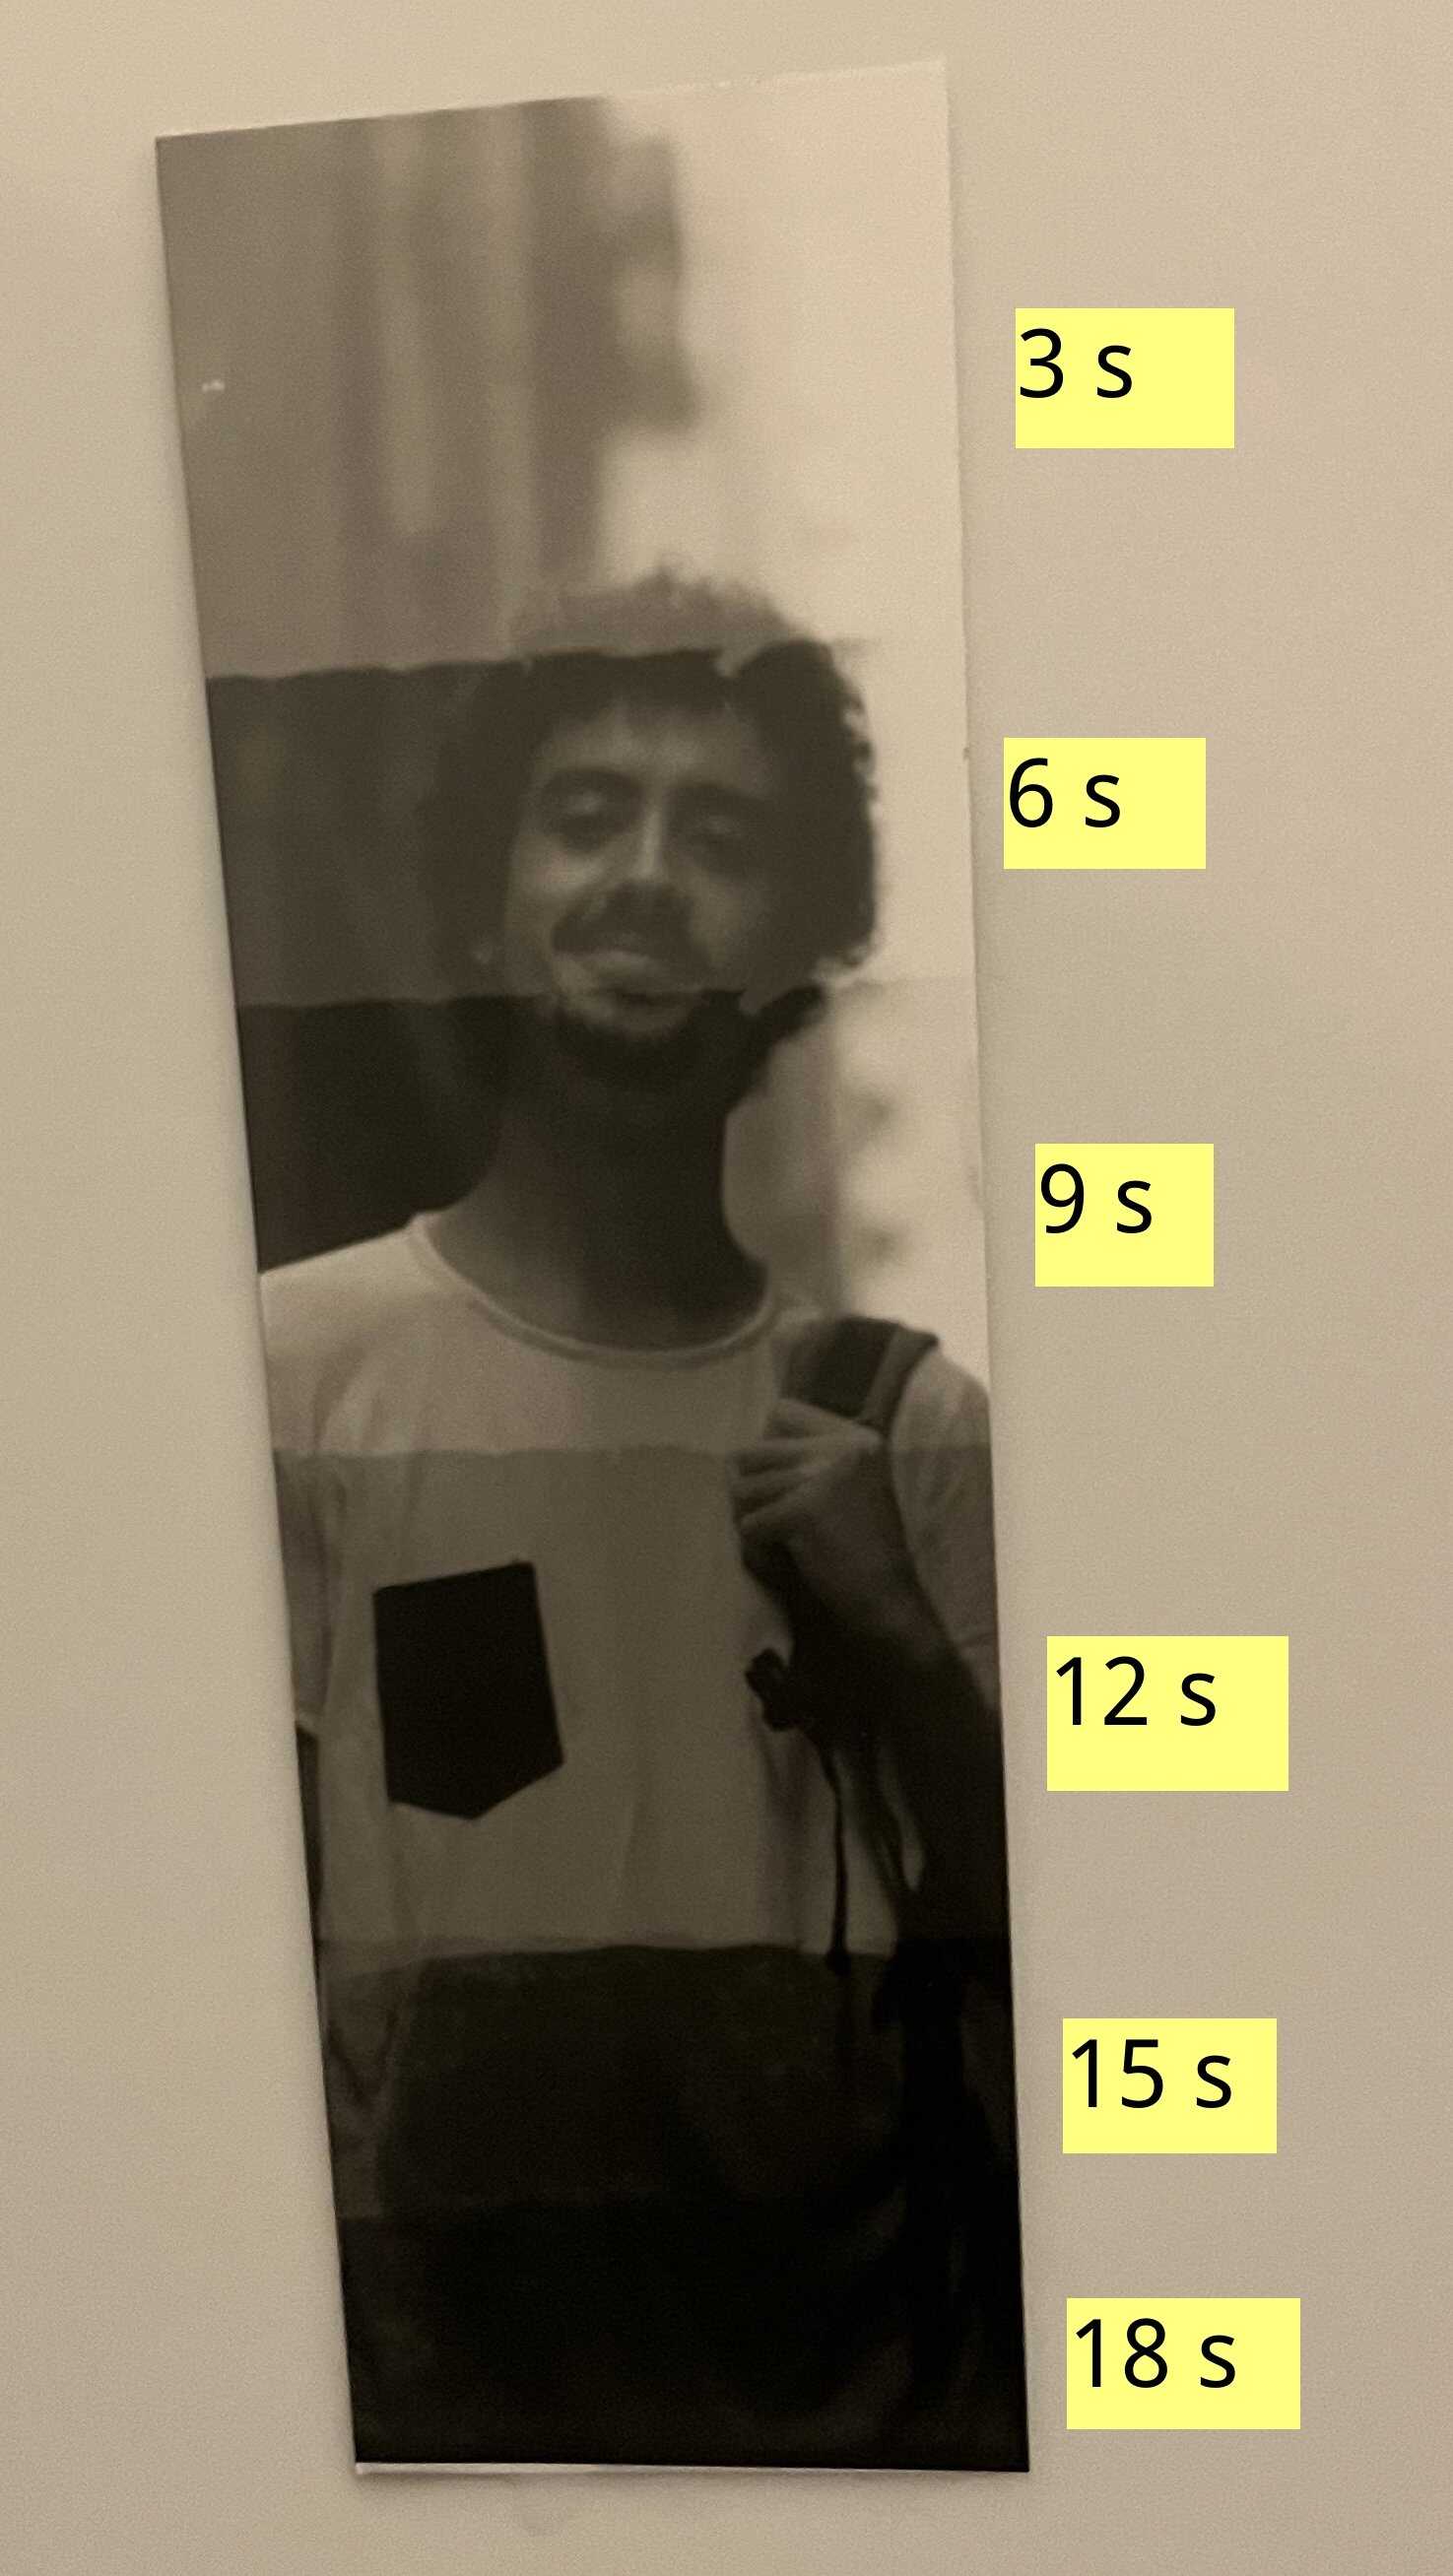
Now we’ll expose the test strip several times:
- Set the exposure time to 3s
- Cover ~80% of the test strip with the black cardboard you see laying around
- Expose by pressing the button with the dot
- Slide the black cardboard to now expose ~60% of the test strip. Expose again.
- Repeat until you’ll have obtained around 6 different exposure times
p.s. the time is always left at 3s. The exposure is longer just because we’re re-exposing the same parts over and over again.
4. Develop
Now we’ll need to develop the test strip:
- Take it out of the paper holder and put it in the developer tray. We’ll leave it here for 60s (we should start to see something appear after 30s). Create some waves by moving the tray to “stir” the liquid
- After 60s put the strip in the stopper just for a quick bath
- Then another quick bath in the fixer. Now the paper is safe to light
- Finally wash it in the last tray
n.b. remember to use the correct clip for each tray, so not to mix chemicals
5. Expose
Now that you have your developed test strip we can choose the desired exposure time and create our picture.
- Set the exposure time on the controller
- Place the paper in the holder
- Expose
- Develop as before
The only addition now is to wipe down a bit of liquid from the paper and than put it to dry (use the bottommost drying rack. They’re under the desk.)

6. Finish
Pour the developer and fixer back into their bottles. The stopper and the wash can be poured down the drain. Then put back everything in place.